Testing with Node and Docker Compose, Part 2: On the Frontend
This post is the second in a short series about automated testing in node.js web applications with Docker. Last time, we looked at backend testing; this time, we’ll look at frontend testing.
To illustrate, we’ll continue building and testing our example application: a simple TODO list manager. So far, we’ve built and tested a RESTful API to manage the task list:
# Create a task 'foo'.
$ curl --header 'Content-Type: application/json' \
  --data '{"description": "foo"}' \
  http://localhost:8080/api/tasks
{"task":{"description":"foo","id":1}}

# List the tasks, which now include 'foo'.
$ curl http://localhost:8080/api/tasks
{"tasks":[{"id":1,"description":"foo"}]}

# Complete task 'foo' by its ID.
$ curl -X DELETE http://localhost:8080/api/tasks/1
In this post, we’ll build and test a frontend that is hopefully more user friendly than curl! Here’s what it will look like:
In particular, this post will cover:
- building a simple frontend with React, Bootstrap and webpack,
- building the frontend with a multi-stage Dockerfile, for both development and production,
- running backend and frontend containers in Docker Compose, and
- frontend testing with jsdom, React Testing Library, fetch-mock and testdouble.js.
Subsequent posts will extend the approach developed here to include end-to-end testing and then multiple backend services.
The code is available on GitHub, and each post in the series has a git tag that marks the corresponding code.
The TODO List Manager Frontend
Let’s start with a tour of the frontend we’ll be developing and testing. The frontend comprises three React components, App, NewTask and Task, and a taskStore singleton. Here’s an overview of how they interact:

-
The
taskStoreis a singleton that holds the frontend’s copy of the task list and makes requests to the backend API in response to user actions. (The term ‘store’ comes from redux, but this application doesn’t actually use redux.) -
Appis a coordinating component. It renders the top level UI, aNewTaskcomponent and oneTaskcomponent for each task. It initiates the initial request for tasks when it’s rendered, and it listens for the updated list of tasks from thetaskStore. It puts the task list into itsstate, so when the task list changes, React will re-render the relevant parts of the UI. -
The
NewTaskcomponent is responsible for creating new tasks, and theTaskcomponent is responsible for displaying a task allowing the user to mark it as completed. Both components call through to thetaskStorewhen the user takes an action, which then updates the task list, which triggers a re-render as required.
Here’s what some of the code looks like:
frontend/src/task-store.js
const TASKS_API_ROOT = '/api/tasks'

class TaskStore {
  constructor() {
    this.tasks = []
    this.listener = () => {}
  }

  listen(listener) {
    this.listener = listener
  }

  unlisten() {
    this.listener = () => {}
  }

  async list() {
    const response = await fetchJson(rootUrl())
    if (!response.ok) throw new Error('Failed to list tasks')
    const body = await response.json()
    this.tasks = body.tasks
    this.listener()
  }

  async create(description) {
    const response = await fetchJson(rootUrl(), {
      method: 'POST',
      body: JSON.stringify({ description })
    })
    if (!response.ok) {
      if (response.status === 400) {
        const body = await response.json()
        throw new Error(body.error.message)
      }
      throw new Error('Failed to create task')
    }
    await this.list()
  }

  async complete(id) {
    const response = await fetchJson(itemUrl(id), { method: 'DELETE' })
    if (!response.ok) throw new Error(`Failed to complete ${id}`)
    await response.text() // ignore
    await this.list()
  }
}

async function fetchJson(url, options) {
  const response = await fetch(url, {
    headers: {
      Accept: 'application/json',
      'Content-Type': 'application/json'
    },
    ...options
  })
  return response
}

function rootUrl() {
  return new URL(TASKS_API_ROOT, window.location.origin)
}

function itemUrl(id) {
  if (!id) throw new Error(`bad id: ${id}`)
  return new URL(id.toString(), rootUrl() + '/')
}

const taskStore = new TaskStore()

export default taskStore
A few notable points:
-
The
taskStoresingleton implements a very simple event system: one listener can calltaskStore.listenwith a callback to be notified when the task list changes. In this case, there’s only one listener, theAppcomponent, so this is sufficient, but of course a more general event system could be used if needed. Using events here helps reduce coupling between the store and the rest of the frontend; in particular, the logic in the store doesn’t depend on React. -
The
taskStorecould try to be smart and update its localtasksarray in response tocreateandcompletecalls, but for now it just re-requests the whole task list from the backend whenever it knows the list has changed. This keeps the store simpler. -
It uses
fetchto talk to the backend through a small wrapper function,fetchJson, which sets up the required headers. And it usesURLto build the API URLs, to slightly reduce the amount of manual URL string munging required.
Next let’s look at the App component, which uses the task list from the store:
frontend/src/component/app.js
import React from 'react'
import NewTask from './new-task'
import Task from './task'
import taskStore from '../task-store'
export default class App extends React.Component {
constructor(props) {
super(props)
this.state = {
tasks: null,
listError: null
}
}
componentDidMount() {
taskStore.listen(() => this.setState({ tasks: taskStore.tasks }))
this._listTasks()
}
componentWillUnmount() {
taskStore.unlisten()
}
async _listTasks() {
try {
await taskStore.list()
} catch (listError) {
this.setState({ listError })
}
}
render() {
let listItems
if (this.state.listError) {
listItems = (
<li className="list-group-item">
Failed to load tasks. Please refresh the page.
</li>
)
} else {
if (this.state.tasks) {
listItems = this.state.tasks.map(({ id, description }) => (
<Task id={id} description={description} key={id} />
))
} else {
listItems = <li className="list-group-item">Loading…</li>
}
}
return (
<div className="container">
<div className="row">
<div className="col">
<h1 className="mt-5 mb-3 text-center">TO DO</h1>
</div>
</div>
<div className="row">
<div className="col">
<ul className="list-group">
<NewTask />
{listItems}
</ul>
</div>
</div>
</div>
)
}
}
It looks fairly long, but most of it is just error handling, latency compensation and some rather verbose HTML for bootstrap styles.
-
The component starts off in a ‘Loading…’ state with no tasks.
-
It asks the
taskStoreto start the first data fetch in the background and notify it of the results, using React’scomponentDidMountandcomponentWillUnmountlifecycle methods. -
Once the data comes back, it will render the list, or, if an error occurred display a (not particularly great) error message.
The child components handle most of the UI. Let’s look at the Task component:
frontend/src/component/task.js
import PropTypes from 'prop-types'
import React, { useState, useEffect } from 'react'

import taskStore from '../task-store'

const Task = ({ id, description }) => {
  const [completing, setCompleting] = useState(false)

  useEffect(() => {
    let unmounted = false

    async function complete() {
      try {
        await taskStore.complete(id)
      } catch (err) {
        alert(err.message)
      } finally {
        if (!unmounted) setCompleting(false)
      }
    }
    if (completing) complete()

    return () => {
      unmounted = true
    }
  }, [completing])

  return (
    <li className="list-group-item todo-task">
      <form
        onSubmit={e => {
          setCompleting(true)
          e.preventDefault()
        }}
      >
        <p>
          <span>{description}</span>
          <button
            className="btn btn-success float-right"
            type="submit"
            style={{ minWidth: '3em' }}
            disabled={completing}
            aria-label={`mark ${description} complete`}
          >
            ✓
          </button>
        </p>
      </form>
    </li>
  )
}

Task.propTypes = {
  id: PropTypes.number,
  description: PropTypes.string
}

export default Task
This is a smaller component, but again there are a few things to comment on:
-
Since the component is mostly driven by its
propsand has relatively little state, I’ve written it as a functional component that uses React hooks. It has one state variable,completing, that tracks whether there is currently a request in progress and disables the button. -
Because the
taskStoreupdates the list asynchronously, thetaskStore.completecall can finish after the component has been unmounted, in which case trying to update the state is an error. Theunmountedvariable tracks when the component is unmounted, to avoid this. -
The button sets an
aria-labelto be friendlier to screen readers, for improved accessibility. We’ll also see that it’s helpful in testing, later.
The NewTask component is similar.
Finally, to bring it together, we also need an index.html file and an entrypoint to load up all our various polyfills and render the App component.
Packaging Backend and Frontend
Now that we have the frontend code, let’s see how to build it and get it working with the backend express application that we developed in part 1. The main points are:
-
Put the backend and the frontend into separate packages. Each can then have its own
package.jsonfile and dependencies (and dev dependencies). Frontend applications these days have a lot of dependencies that are not needed on the backend.npm auditreports that our todo demo app frontend pulls in 10,997 packages, most of which are related to webpack. -
In development, run the backend and the frontend in separate containers. The backend container runs the backend service as usual, and the frontend container, which is what our browser will talk to, runs an instance of
webpack-dev-serverconfigured to serve the frontend and proxy the API endpoints through to the backend container. -
For production, build the frontend using a multistage
Dockerfileshared between the backend and the frontend. This lets us build the frontend in one stage withwebpackand then copy the resulting build artifacts fromdistinto the production backend image in a later stage, so the backend can simply serve them as static files.
This may be clearer in diagram form:

Let’s start with the multistage Dockerfile responsible for producing the images for both the backend and the frontend. It uses the techniques that I covered in the first Docker post to avoid running as root, and to the use of slim images for smaller image sizes, so I’ll skip the details related to those things and talk about the overall structure below.
Dockerfile
#
# Backend for Development
#
FROM node:12 AS development-backend

RUN mkdir -p /srv/todo/backend && chown -R node:node /srv/todo

USER node

WORKDIR /srv/todo/backend

COPY --chown=node:node backend/package.json backend/package-lock.json ./

RUN npm install --quiet

#
# Frontend for Development
#
FROM node:12 AS development-frontend

RUN mkdir -p /srv/todo/frontend/dist && chown -R node:node /srv/todo

USER node

WORKDIR /srv/todo/frontend

COPY frontend/package.json frontend/package-lock.json ./

RUN npm install --quiet

#
# Frontend Build for Production
#
FROM development-frontend AS build-frontend

COPY frontend .

RUN npm run build

#
# Backend for Production
#
FROM node:12-slim AS production

USER node

WORKDIR /srv/todo/backend

COPY --from=development-backend --chown=root:root /srv/todo/backend/node_modules ./node_modules

COPY --from=build-frontend --chown=root:root /srv/todo/frontend/dist ./dist

COPY . .

CMD ["node", "server.js"]
The stages are laid out linearly in the file, but it may be easier to follow in this graph, which shows what each stage derives or copies files from:

-
The
development-backendstage installs the dependencies for the backend 1. It doesn’t actually copy the application source into the image, because we’ll instead bind mount those files into the container with Docker Compose, below. -
The
development-frontendstage does the same for the frontend. -
The
build-frontendstage runs the webpack build. It starts fromdevelopment-frontendstage rather than a node base image, so it can use the packages we just installed, and it copies in the frontend source files, which are the inputs for the webpack build. -
The
productionstage copies in the dependencies from thedevelopment-backendso it can run the backend express application, and it copies thedistfolder, which is the output of the webpack build, so it can serve the frontend 2.
In development, we won’t actually build the production stage, so it’s just the development-backend and development-frontend that we’ll need in this post. Those will be referenced in the docker-compose file, which will change from part 1 to the following, with an additional frontend service:
docker-compose.yml
version: '3.7'

services:
  backend:
    build:
      context: .
      target: development-backend
    command: npx nodemon server.js
    depends_on:
      - postgres
    environment:
      PORT: 8080
    volumes:
      - ./backend:/srv/todo/backend
      - backend_node_modules:/srv/todo/backend/node_modules

  frontend:
    build:
      context: .
      target: development-frontend
    command: npx webpack-dev-server
    depends_on:
      - backend
    environment:
      HOST: frontend
      PORT: 8080
    ports:
      - '8080:8080'
    volumes:
      - ./frontend:/srv/todo/frontend
      - frontend_node_modules:/srv/todo/frontend/node_modules

  postgres:
    image: postgres:12
    environment:
      POSTGRES_HOST_AUTH_METHOD: trust

volumes:
  backend_node_modules:
  frontend_node_modules:
Key points are:
-
The name of the Dockerfile stage targeted by the
backendservice changed from justdevelopmenttodevelopment-backend, as discussed above. -
The new
frontendservice runswebpack-dev-server. It depends on thebackendservice so it can proxy requests for the API back to the backend. -
The exposed port
8080moved from the backend service to the frontend service, so we can view the frontend in the browser. -
The
node_modulesvolume trick described in the first Docker post is repeated for the frontend, so there are now two volumes that contain thenode_modules. I have also changed the paths to reflect the separation intobackendandfrontendpackages.
Finally, we need the to set up webpack.config.js to do the proxying. Here’s the relevant part of the webpack config that proxies requests from the browser to the frontend under /api through to the backend service:
frontend/webpack.config.js
// ... setup ...

module.exports = {
  mode: process.env.NODE_ENV === 'production' ? 'production' : 'development',
  devServer: {
    // Allow connections from outside the container (not much use otherwise).
    host: process.env.HOST || '0.0.0.0',
    // Proxy api routes through to the todo backend.
    proxy: [
      {
        context: ['/api'],
        target: `http://backend:${process.env.PORT}`
      }
    ]
  },
  entry: './src/index.js',
  // ... more config ...
With all that in place, we can now bring up the frontend and backend with the bin/up script from part 1, and see the UI on http://localhost:8080. Here’s that gif again:
The Tests
Now that we have a frontend, let’s look at how to test it. I’ve written three types of tests, model tests, component tests, and integration tests. Like on the backend, these types of tests can be understood in terms of the different layers of the Model-View-Controller (MVC) architecture.
The model tests test the model layer, which contains the application’s core business logic. In this case, the entire model layer for the frontend is essentially the TaskStore class.
The component tests test the controller and view layers. In React applications, the controller and view layers tend to be combined together with in the same component. For example, the Task component has logic for dealing with in progress operations and error handling, as well as the JSX code that actually generates the DOM for the UI. So, at least for a React application, it makes sense to test these two layers together, component-by-component.
Finally, the integration tests test that the models and components work together as expected. In diagram form:

Notably, the frontend tests don’t include the backend. I have instead faked the HTTP requests to the backend API for frontend testing; more on this in the conclusion.
Integration Tests
Let’s start with the integration tests. In this case, there’s only one, which is essentially a ‘happy path’ test for the whole frontend — listing, creating and completing tasks.
frontend/test/integration/todo.test.js
import React from 'react'
import {
  cleanup,
  fireEvent,
  render,
  waitForElement,
  waitForElementToBeRemoved
} from '@testing-library/react'

import fetchMock from '../support/fetch-mock'
import App from '../../src/component/app'

describe('TO DO App', function() {
  afterEach(cleanup)
  afterEach(fetchMock.reset)

  it('lists, creates and completes tasks', async function() {
    // Load empty list.
    fetchMock.getOnce('path:/api/tasks', { tasks: [] })

    const { getByText, getByLabelText } = render(<App />)

    const description = getByLabelText('new task description')
    const addTask = getByLabelText('add task')

    await waitForElementToBeRemoved(() => getByText(/loading/i))

    // Create 'find keys' task.
    fetchMock.postOnce('path:/api/tasks', {
      task: { id: 1, description: 'find keys' }
    })
    fetchMock.getOnce('path:/api/tasks', {
      tasks: [{ id: 1, description: 'find keys' }]
    })
    fireEvent.change(description, { target: { value: 'find keys' } })
    fireEvent.click(addTask)

    await waitForElement(() => getByText('find keys'))

    // Create 'buy milk' task.
    fetchMock.postOnce('path:/api/tasks', {
      task: { id: 2, description: 'buy milk' }
    })
    fetchMock.getOnce('path:/api/tasks', {
      tasks: [
        { id: 1, description: 'find keys' },
        { id: 2, description: 'buy milk' }
      ]
    })
    fireEvent.change(description, { target: { value: 'buy milk' } })
    fireEvent.click(addTask)

    await waitForElement(() => getByText('buy milk'))

    // Complete 'buy milk' task.
    fetchMock.deleteOnce('path:/api/tasks/2', 204)
    fetchMock.getOnce('path:/api/tasks', {
      tasks: [{ id: 1, description: 'find keys' }]
    })

    fireEvent.click(getByLabelText('mark buy milk complete'))

    await waitForElementToBeRemoved(() => getByText('buy milk'))

    // Complete 'find keys' task.
    fetchMock.deleteOnce('path:/api/tasks/1', 204)
    fetchMock.getOnce('path:/api/tasks', { tasks: [] })

    fireEvent.click(getByLabelText('mark find keys complete'))

    await waitForElementToBeRemoved(() => getByText('find keys'))
  })
})
-
The test uses React Testing Library, which provides test helpers that simulate a user interacting with the React application. The library’s motto is “The more your tests resemble the way your software is used, the more confidence they can give you.”, which I generally agree with.
The
getByTextandgetByLabelTextfunctions returned by React Testing Library’srenderfunction let us query for UI elements using text visible to the user or, in some cases, screen readers viaariaproperties. ThefireEventfunction lets us then click on or type in those elements. Finally, the asynchronouswaitForElementandwaitForElementToBeRemovedfunctions let the test wait for an expected change to the UI. -
The test starts by rendering the top level
Appcomponent, which causes theTaskStoreto request the task list from the API. The test usesfetchMockbefore rendering the component to set up a fake response that returns an empty task list when theTaskStorerequests it. The test then largely repeats in this pattern — mock the requests we expect, manipulate the UI, and then wait for it to reach the expected state.
Model Tests
As mentioned, this application’s model layer is essentially all in one class, TaskStore. Since the integration tests exercise the happy path well, including getting the TaskStore to make requests and verifying them with fetchMock, the model tests can focus mainly on error handling.
frontend/test/model/task-store.test.js
import assert from 'assert'
import td from 'testdouble'

import fetchMock from '../support/fetch-mock'
import taskStore from '../../src/task-store'

describe('TaskStore', function() {
  afterEach(fetchMock.reset)

  afterEach(function() {
    taskStore.unlisten()
  })

  it('lists tasks', async function() {
    const listener = td.function()
    taskStore.listen(listener)

    fetchMock.getOnce('path:/api/tasks', {
      tasks: [{ id: 1, description: 'foo' }, { id: 2, description: 'bar' }]
    })
    await taskStore.list()
    assert(taskStore.tasks.length === 2)

    td.verify(listener())
  })

  it('handles 500 error on listing', async function() {
    taskStore.listen(shouldNotCallListener)
    fetchMock.getOnce('path:/api/tasks', 500)
    try {
      await taskStore.list()
    } catch (err) {
      assert.strictEqual(err.message, 'Failed to list tasks')
    }
  })

  it('handles 400 error on task creation', async function() {
    taskStore.listen(shouldNotCallListener)
    fetchMock.postOnce('path:/api/tasks', {
      status: 400,
      body: { error: { message: 'test: create failed' } }
    })
    try {
      await taskStore.create('')
    } catch (err) {
      assert.strictEqual(err.message, 'test: create failed')
    }
  })

  it('handles 500 error on task creation', async function() {
    taskStore.listen(shouldNotCallListener)
    fetchMock.postOnce('path:/api/tasks', 500)
    try {
      await taskStore.create('find keys')
    } catch (err) {
      assert.strictEqual(err.message, 'Failed to create task')
    }
  })

  it('handles 500 error on task completion', async function() {
    taskStore.listen(shouldNotCallListener)
    fetchMock.deleteOnce('path:/api/tasks/1', 500)
    try {
      await taskStore.complete(1)
    } catch (err) {
      assert.strictEqual(err.message, 'Failed to complete 1')
    }
  })

  function shouldNotCallListener() {
    throw new Error('should not call listener')
  }
})
-
Like the integration tests, these tests use
fetchMockto mock the HTTP requests that the store makes. They also use (one small part of)testdoubleto verify that theTaskStore’s listener is called at the expected times, namely when the UI should be updated with the new task list. -
The first model test is a ‘sanity test’ that overlaps a bit with the integration tests, in that it’s a ‘happy path’ test. We could write similar happy path model tests for the other public methods of the task store, but it would not be add much value in this case — the happy path for the single consumer of this
TaskStoreis relatively simple and well covered 3 by an integration test, so testing it exhaustively at model level would yield diminishing returns. If the ‘happy path’ were more complex, for example with more branching into many ‘happy paths’, it might make sense to only test some of the happy paths at integration test level and test the rest at model level. And if there were many consumers for thisTaskStore, having more complete model testing might help to clarify the contract that it has with those consumers. -
The remaining tests are for error conditions.
fetchMockmakes it easy to simulate errors from the backend, such as status 400 or 500 responses — a good use case for mocking.
Component Tests
Finally, we have the component tests. The ‘happy path’ integration test did exercise the components, but it didn’t make any assertions about latency compensation or error handling, which is where most of the complexity in the components comes from. So, these areas are a good focus for the component tests. Let’s look at the tests for the Task component:
frontend/test/component/task.test.js
import React from 'react'
import td from 'testdouble'
import { cleanup, fireEvent, render, wait } from '@testing-library/react'

import Task from '../../src/component/task'
import taskStore from '../../src/task-store'

describe('Task', function() {
  afterEach(cleanup)
  afterEach(td.reset)

  const testId = 123
  const testDescription = 'find keys'

  let complete, completeResolve, completeReject
  beforeEach(function() {
    const { getByText } = render(
      <Task id={testId} description={testDescription} />
    )
    complete = getByText('✓')

    const taskStoreComplete = td.replace(taskStore, 'complete')
    const completePromise = new Promise((resolve, reject) => {
      completeResolve = resolve
      completeReject = reject
    })
    td.when(taskStoreComplete(testId)).thenReturn(completePromise)

    fireEvent.click(complete)
  })

  it('completes a task', async function() {
    // The button should be disabled while we're submitting.
    await wait(() => complete.disabled)
    completeResolve()
    await wait(() => !complete.disabled)
  })

  it('handles failure to complete', async function() {
    const alert = td.replace(global, 'alert') // yes, I'm using alert

    // The button should be disabled while we're submitting.
    await wait(() => complete.disabled)
    completeReject(new Error('test message'))
    await wait(() => !complete.disabled)

    // Show the user the error message (ideally would be friendlier).
    td.verify(alert('test message'))
  })
})
-
The component tests use React Testing Library to render the component under test and make assertions about it, and
testdoubleto mock the interactions with theTaskStore. We could instead include theTaskStorein the system under test and mock the requests it makes withfetch-mock, but since thetaskStoresingleton presents a relatively simple interface for mocking, and we’d have to mock somewhere, I’ve gone with mocking at the model level here. (See also part 1 for a discussion of when and what to mock.) -
Both tests here relate to what happens when the user clicks the complete button for the task, so the code to set up the state for the test is in a shared
beforeEach. If we had a wider range of states and behaviors to set up, some of it would probably be better moved to a separatedescribewith its ownbeforeEach, but here I’ve just put it all together to keep it simple (YAGNI). -
The tests check that the button is disabled (to prevent double clicks) and re-enabled in both the success and error cases, and that an error message is shown in the error case.
The tests for the NewTask component and the App component are similar.
One thing that these component tests don’t cover is how things look, or indeed anything about the structure of the DOM they generate, other than the presence of appropriate buttons or text. Assertion-based testing like that above tends to be quite time-consuming when used at that level of detail, both initially to create and over time to update when anything changes. And, in my experience, subtle bugs still tend to slip through, for example due to CSS making things invisible or unclickable. So, here I’ve left the visual testing to manual testing. Another approach that seems interesting is snapshot testing, in which we just record what was rendered so that any changes can be noted, but I have not so far used it in anger. Some of the visual testing can also be achieved with end-to-end tests, which will be the subject of the next post in this series.
Running the Tests
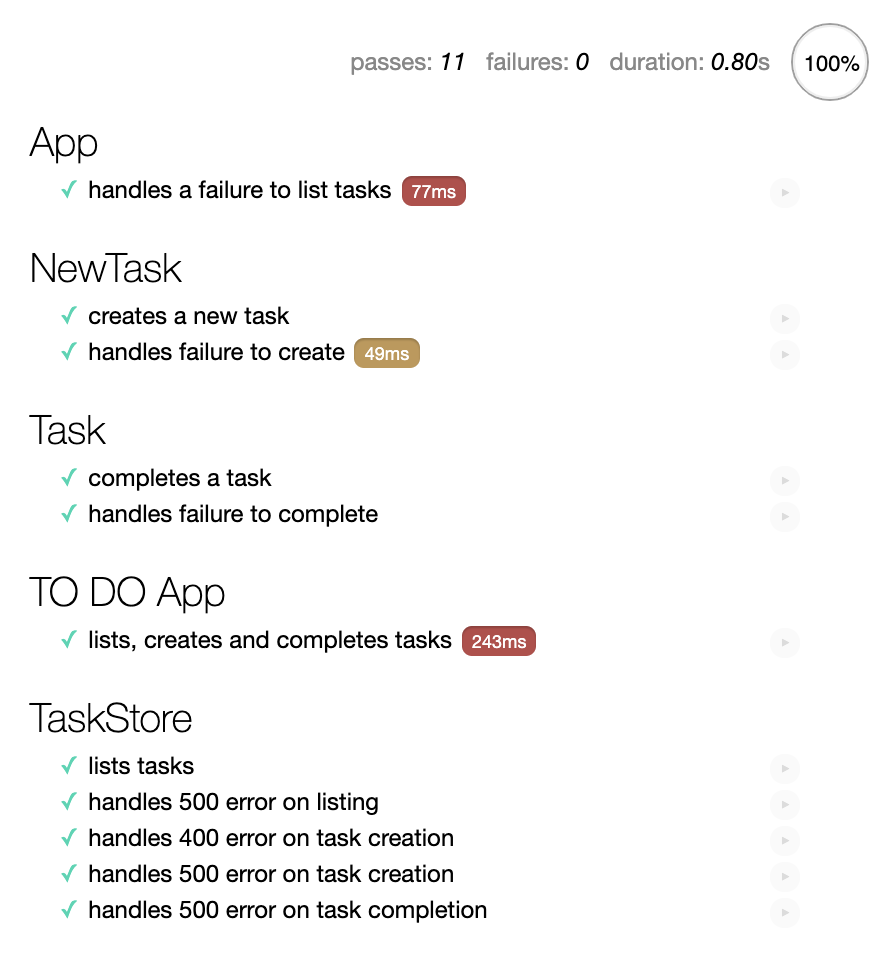
So, we have finally reached the part where we can run npm test in a container. In particular, the tests will run in the frontend container. They are set up to run in node with jsdom and babel, which requires some setup when running mocha. This allows us to run the tests on the command line in a simulated browser environment, which is quicker to set up than a full browser.
$ docker-compose run --rm frontend npm test
Starting todo_postgres_1 ... done
Starting todo_backend_1     ... done

> frontend@1.0.0 test /srv/todo/frontend
> mocha --require test/setup


  App
    ✓ handles a failure to list tasks (587ms)

  NewTask
    ✓ creates a new task
    ✓ handles failure to create

  Task
    ✓ completes a task
    ✓ handles failure to complete

  TO DO App
    ✓ lists, creates and completes tasks (198ms)

  TaskStore
    ✓ lists tasks
    ✓ handles 500 error on listing (49ms)
    ✓ handles 400 error on task creation
    ✓ handles 500 error on task creation
    ✓ handles 500 error on task completion


  11 passing (1s)
That said, it’s nice to also be able to run the tests in a real browser, and there is a handy webpack loader, mocha-loader that can handle this. I added a short script to get it to expose the test runner on another port using Docker Compose’s --publish flag:
bin/browser-test
#!/usr/bin/env bash

#
# Run the frontend tests in a browser on http://localhost:8181 .
#

set -e

docker-compose run --rm --publish 8181:8181 --use-aliases frontend \
  npx webpack-dev-server 'mocha-loader!./test/index.js' \
  --port 8181 --hot --inline --output-filename test.js
One caveat is that we need to provide an entrypoint, test/index.js, that imports all the other tests, rather than letting mocha find them on disk itself. This is not so bad, and it’s still possible to run individual tests with --grep. Here’s what it looks like in the browser:
Conclusion
We’ve built, packaged and tested a frontend application using webpack and React, and we’ve wired it up to our backend using Docker and Docker Compose. In particular, we’ve seen that putting the backend and the frontend into the same multistage Dockerfile allows Docker to copy the frontend build artifacts to the backend so the backend can serve them, and that webpack-dev-server’s proxy feature is great for exposing the backend API to the frontend.
We’ve seen three kinds of frontend tests that, like the tests on the backend, focus on different layers of the model-view-controller architecture. In particular, model tests test the frontend model layer, mocking out the HTTP requests to the backend. Component tests test the view and controller layers, mocking out the model layer. And a ‘happy path’ integration test checks that the models and components work together, again mocking the backend requests and responses.
This highlights a potential problem with our tests: we could change the way the backend works in such a way that the frontend would break, and the tests would all still pass, because the mocked requests in the frontend tests would be out of date. Next time, we’ll set up some end-to-end tests that will test the backend and frontend together. See you then!
If you’ve read this far, you should follow me on twitter, or maybe even apply to work at Overleaf. :)
Footnotes
-
This Dockerfile copies the backend dev dependencies (in addition to the runtime dependencies) into the production image. If you would rather not do this, it can be avoided by adding an additional
build-backendstep that installs only the production dependencies. However, because the Dockerfile is already quite long, I’ll leave this as an exercise for the reader. ↩ -
This approach of bundling the single latest version of the frontend in the production is very clean and container-y and works well at small scale. However, assuming webpack is set up to use asset hashing, you can easily get into a situation where changes to the frontend will result in 404s on assets during or soon after a deploy, because clients are asking for old versions of assets that aren’t in the new image. There are a few ways to fix this:
- If using blue-green deployments, putting a pull-mode CDN or caching reverse proxy, such as CloudFlare, in front of the application should in most cases keep old versions of the frontend assets around for long enough. Another option is to add a build cache to the image build process to copy some older versions of the frontend assets in, as well as the latest version. This is similar to how Heroku’s build packs and build cache work.
- If using rolling deployments, which are popular in Kubernetes environments, a push-mode CDN is required, because otherwise requests for new assets might land on pods that are still running the old code, resulting in 404s on the new assets instead of the old ones. The approach here would be to extract the assets from the image before it’s deployed, e.g. with
docker cpfrom a temporary container, and push them up to the CDN. Or you could do a two-phase deploy, with the old backend plus new assets and then the new backend plus new assets.
It’s never easy. ↩
-
This article is long enough without also talking about measuring code coverage, but I think it is a good thing to do. Here it’s simple enough to see which tests cover which code, but in a larger application it is often less clear. Code coverage is particularly helpful when the time comes to optimize the test suite. The process of identifying redundant tests or those that add little coverage relative to their running times can then be quantified and to some extent automated. It can also help identify dead code to be deleted. ↩