Lessons from Building Node Apps in Docker (2019)
Update (2019-10-10): This post was discussed on Hacker News.
Way back in 2016, I wrote Lessons from Building a Node App in Docker, which has now helped over a hundred thousand people Dockerize their node.js apps. Since then there have been many changes, both in the ecosystem and how I work with node in Docker, so it was due for an overhaul.
In this updated tutorial, we’ll set up the socket.io chat example with Docker, from scratch to production-ready. In particular, we’ll see how to:
- Get started bootstrapping a node application with Docker.
- Not run everything as root (bad!).
- Use binds to keep your test-edit-reload cycle short in development.
- Manage
node_modulesin a container (there’s a trick to this). - Ensure repeatable builds with package-lock.json.
- Share a
Dockerfilebetween development and production using multi-stage builds.
This tutorial assumes you already have some familiarity with Docker and node. If you’d like a gentle intro to Docker first, I’d recommend running through Docker’s official introduction.
Getting Started
We’re going to set things up from scratch. The final code is available on github here, and there are tags for each step along the way. Here’s the code for the first step, in case you’d like to follow along.
Without Docker, we’d start by installing node and any other dependencies on the host and running npm init to create a new package. There’s nothing stopping us from doing that here, but we’ll learn more if we use Docker from the start. (And of course the whole point of using Docker is that you don’t have to install things on the host.) We’ll start by creating a “bootstrapping container” that has node installed, and we’ll use it to set up the npm package for the application.
The Bootstrapping Container and Service
We’ll need to write two files, a Dockerfile and a docker-compose.yml, to which we’ll add more later on. Let’s start with the bootstrapping Dockerfile:
FROM node:10.16.3

USER node

WORKDIR /srv/chat
It’s a short file, but there already some important points:
-
It starts from the official Docker image for the latest long term support (LTS) node release, at time of writing. I prefer to name a specific version, rather than one of the ‘floating’ tags like
node:ltsornode:latest, so that if you or someone else builds this image on a different machine, they will get the same version, rather than risking an accidental upgrade and attendant head-scratching. -
The
USERstep tells Docker to run any subsequent build steps, and later the process in the container, as thenodeuser, which is an unprivileged user that comes built into all of the official node images from Docker. Without this line, they would run as root, which is against security best practices and in particular the principle of least privilege. Many Docker tutorials skip this step for simplicity, and we will have to do some extra work to avoid running as root, but I think it’s very important. -
The
WORKDIRstep sets the working directory for any subsequent build steps, and later for containers created from the image, to/srv/chat, which is where we’ll put our application files. The/srvfolder should be available on any system that follows the Filesystem Hierarchy Standard, which says that it is for “site-specific data which is served by this system”, which sounds like a good fit for a node app 1.
Now let’s move on to the bootstrapping compose file, docker-compose.yml:
version: '3.7'

services:
  chat:
    build: .
    command: echo 'ready'
    volumes:
      - .:/srv/chat
Again there is quite a bit to unpack:
-
The
versionline tells Docker Compose which version of its file format we are using. Version 3.7 is the latest at the time of writing, so I’ve gone with that, but older 3.x and 2.x versions would also work fine here; in fact, the 2.x series might even be a better fit, depending on your use case 2. -
The file defines a single service called
chat, built from theDockerfilein the current directory, denoted.. All the service does for now is to echoreadyand exit. -
The volume line,
.:/srv/chat, tells Docker to bind mount the current directory.on the host at/srv/chatin the container, which is theWORKDIRwe set up in theDockerfileabove. This means that changes we’ll make to source files on the host will be automatically reflected inside the container, and vice versa. This is very important for keeping your test-edit-reload cycles as short as possible in development. It will, however, create some issues with how npm installs dependencies, which we’ll come back to shortly.
Now we’re ready to build and test our bootstrapping container. When we run docker-compose build, Docker will create an image with node set up as specified in the Dockerfile. Then docker-compose up will start a container with that image and run the echo command, which shows that everything is set up OK.
$ docker-compose build
Building chat
Step 1/3 : FROM node:10.16.3
# ... more build output ...
Successfully built d22d841c07da
Successfully tagged docker-chat-demo_chat:latest

$ docker-compose up
Creating docker-chat-demo_chat_1 ... done
Attaching to docker-chat-demo_chat_1
chat_1  | ready
docker-chat-demo_chat_1 exited with code 0
This output indicates that the container ran, echoed ready and exited successfully. 🎉
Initializing an npm package
⚠️ Aside for Linux users: For this next step to work smoothly, the
nodeuser in the container should have the sameuid(user identifier) as your user on the host. This is because the user in the container needs to have permissions to read and write files on the host via the bind mount, and vice versa. I’ve included an appendix with advice on how to deal with this issue. Docker for Mac users don’t have to worry about it because of some uid remapping magic behind the scenes, but Docker for Linux users get much better performance, so I’d call it a draw.
Now we have a node environment set up in Docker, we’re ready to set up the initial npm package files. To do this, we’ll run an interactive shell in the container for the chat service and use it to set up the initial package files:
$ docker-compose run --rm chat bash
node@467aa1c96e71:/srv/chat$ npm init --yes
# ... writes package.json ...
node@467aa1c96e71:/srv/chat$ npm install
# ... writes package-lock.json ...
node@467aa1c96e71:/srv/chat$ exit
And then the files appear on the host, ready for us to commit to version control:
$ tree
.
├── Dockerfile
├── docker-compose.yml
├── package-lock.json
└── package.json
Here’s the resulting code on github.
Installing Dependencies
Next up on our list is to install the app’s dependencies. We want these dependencies to be installed inside the container via the Dockerfile, so the container will contain everything needed to run the application. This means we need to get the package.json and package-lock.json files into the image and run npm install in the Dockerfile. Here’s what that change looks like:
diff --git a/Dockerfile b/Dockerfile
index b18769e..d48e026 100644
--- a/Dockerfile
+++ b/Dockerfile
@@ -1,5 +1,14 @@
 FROM node:10.16.3

+RUN mkdir /srv/chat && chown node:node /srv/chat
+
 USER node

 WORKDIR /srv/chat
+
+COPY --chown=node:node package.json package-lock.json ./
+
+RUN npm install --quiet
+
+# TODO: Can remove once we have some dependencies in package.json.
+RUN mkdir -p node_modules
And here’s the explanation:
-
The
RUNstep withmkdirandchowncommands, which are the only commands we need to run as root, creates the working directory and makes sure that it’s owned by the node user. -
It’s worth noting that there are two shell commands chained together in that single
RUNstep. Compared to splitting out the commands over multipleRUNsteps, chaining them reduces the number of layers in the resulting image. In this example, it really doesn’t matter very much, but it is a good habit not to use more layers than you need. It can save a lot of disk space and download time if you e.g. download a package, unzip it, build it, install it, and then clean up in one step, rather than saving layers with all of the intermediate files for each step. -
The
COPYto./copies the npm packaging files to theWORKDIRthat we set up above. The trailing/tells Docker that the destination is a folder. The reason for copying in only the packaging files, rather than the whole application folder, is that Docker will cache the results of thenpm installstep below and rerun it only if the packaging files change. If we copied in all our source files, changing any one would bust the cache even though the required packages had not changed, leading to unnecessarynpm installs in subsequent builds. -
The
--chown=node:nodeflag forCOPYensures that the files are owned by the unprivilegednodeuser rather than root, which is the default 3. -
The
npm installstep will run as thenodeuser in the working directory to install the dependencies in/srv/chat/node_modulesinside the container.
This last step is what we want, but it causes a problem in development when we bind mount the application folder on the host over /srv/chat. Unfortunately, the node_modules folder doesn’t exist on the host, so the bind effectively hides the node modules that we installed in the image. The final mkdir -p node_modules step and the next section are related to how we deal with this.
The node_modules Volume Trick
There are several ways around the node modules hiding problem, but I think the most elegant is to use a volume within the bind to contain node_modules. To do this, we have to add a few lines to our docker compose file:
diff --git a/docker-compose.yml b/docker-compose.yml
index c9a2543..799e1f6 100644
--- a/docker-compose.yml
+++ b/docker-compose.yml
@@ -6,3 +6,7 @@ services:
     command: echo 'ready'
     volumes:
       - .:/srv/chat
+      - chat_node_modules:/srv/chat/node_modules
+
+volumes:
+  chat_node_modules:
The chat_node_modules:/srv/chat/node_modules volume line sets up a named volume 4 called chat_node_modules that contains the directory /srv/chat/node_modules in the container. The top level volumes: section at the end must declare all named volumes, so we add chat_node_modules there, too.
So, it’s simple to do, but there is quite a bit going on behind the scenes to make it work:
- During the build,
npm installinstalls the dependencies (which we’ll add in the next section) into/srv/chat/node_moduleswithin the image. We’ll color the files from the image blue:/srv/chat$ tree # in image . ├── node_modules │ ├── accepts ... │ └── yeast ├── package-lock.json └── package.json
- When we later start a container from that image using our compose file, Docker first binds the application folder from the host inside the container under
/srv/chat. We’ll color the files from the host red:/srv/chat$ tree # in container without node_modules volume . ├── Dockerfile ├── docker-compose.yml ├── node_modules ├── package-lock.json └── package.json
The bad news is that the
node_modulesin the image are hidden by the bind; inside the container, we instead see only an emptynode_modulesfolder on the host. - However, we’re not done yet. Docker next creates a volume that contains a copy of
/srv/chat/node_modulesin the image, and it mounts it in the container. This, in turn, hides thenode_modulesfrom the bind on the host:/srv/chat$ tree # in container with node_modules volume . ├── Dockerfile ├── docker-compose.yml
├── node_modules │ ├── accepts ... │ └── yeast├── package-lock.json └── package.json
This gives us what we want: our source files on the host are bound inside the container, which allows for fast changes, and the dependencies are also available inside of the container, so we can use them to run the app.
We can also now explain the final mkdir -p node_modules step in the bootstrapping Dockerfile above: we have not actually installed any packages yet, so npm install doesn’t create the node_modules folder during the build. When Docker creates the /srv/chat/node_modules volume, it will automatically create the folder for us, but it will be owned by root, which means the node user won’t be able to write to it. We can preempt that by creating node_modules as the node user during the build. Once we have some packages installed, we no longer need this line.
Package Installation
So, let’s rebuild the image, and we’ll be ready to install packages.
$ docker-compose build
... builds and runs npm install (with no packages yet)...
The chat app requires express, so let’s get a shell in the container and npm install it with --save to save the dependency to our package.json and update package-lock.json accordingly:
$ docker-compose run --rm chat bash
Creating volume "docker-chat-demo_chat_node_modules" with default driver
node@241554e6b96c:/srv/chat$ npm install --save express
# ...
node@241554e6b96c:/srv/chat$ exit
The package-lock.json file, which has for most purposes replaced the older npm-shrinkwrap.json file, is important for ensuring that Docker image builds are repeatable. It records the versions of all direct and indirect dependencies and ensures that npm installs in Docker builds on different machines will all get the same dependency tree.
Finally, it’s worth noting that the node_modules we installed are not present on the host. There may be an empty node_modules folder on the host, which is a side effect of the binds and volumes we created, but the actual files live in the chat_node_modules volume. If we run another shell in the chat container, we’ll find them there:
$ ls node_modules
# nothing on the host
$ docker-compose run --rm chat bash
node@54d981e169de:/srv/chat$ ls -l node_modules/
total 196
drwxr-xr-x 2 node node 4096 Aug 25 20:07 accepts
# ... many node modules in the container
drwxr-xr-x 2 node node 4096 Aug 25 20:07 vary
The next time we run a docker-compose build, the modules will be installed into the image.
Here’s the resulting code on github.
Running the App
We are finally ready to install the app, so we’ll copy in the remaining source files, namely index.js and index.html.
Then we’ll install the socket.io package. At the time of writing, the chat example is only compatible with socket.io version 1, so we need to request version 1:
$ docker-compose run --rm chat npm install --save socket.io@1
# ...
In our docker compose file, we then remove our dummy echo ready command and instead run the chat example server. Finally, we tell Docker Compose to export 3000 in the container on the host, so we can access it in a browser:
diff --git a/docker-compose.yml b/docker-compose.yml
index 799e1f6..ff92767 100644
--- a/docker-compose.yml
+++ b/docker-compose.yml
@@ -3,7 +3,9 @@ version: '3.7'
 services:
   chat:
     build: .
-    command: echo 'ready'
+    command: node index.js
+    ports:
+      - '3000:3000'
     volumes:
       - .:/srv/chat
       - chat_node_modules:/srv/chat/node_modules
Then we are ready to run with docker-compose up 5:
$ docker-compose up
Recreating dockerchatdemo_chat_1
Attaching to dockerchatdemo_chat_1
chat_1 | listening on *:3000
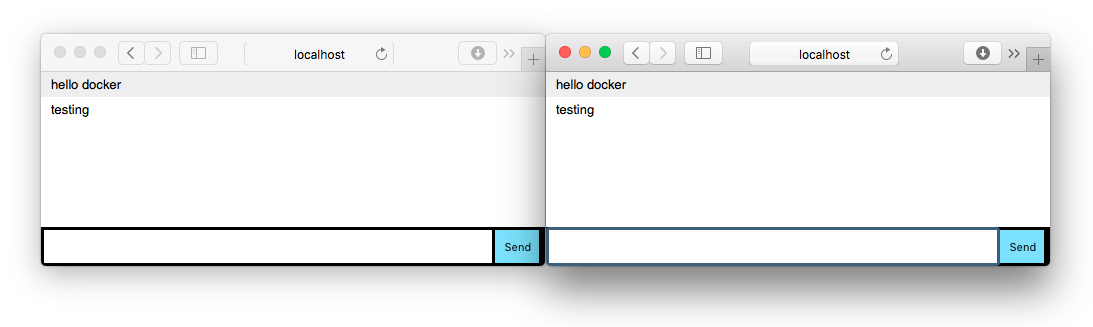
Then you can see it running on http://localhost:3000.
Here’s the resulting code on github.
Docker for Dev and Prod
We now have our app running in development under docker compose, which is pretty cool! Before we can use this container in production, we have a few problems to solve and possible improvements to make:
-
Most importantly, the container as we’re building it at the moment does not actually contain the source code for the application — it just contains the npm packaging files and dependencies. The main idea of a container is that it should contain everything needed to run the application, so clearly we will want to change this.
-
The
/srv/chatapplication folder in the image is currently owned and writeable by thenodeuser. Most applications don’t need to rewrite their source files at runtime, so again applying the principle of least privilege, we shouldn’t let them. -
The image is fairly large, weighing in at 909MB according to the handy dive image inspection tool. It’s not worth obsessing over image size, but we don’t want to be needlessly wasteful either. Most of the image’s heft comes from the default
nodebase image, which includes a full compiler tool chain that lets us build node modules that use native code (as opposed to pure JavaScript). We won’t need that compiler tool chain at runtime, so from both a security and performance point of view, it would be better not to ship it to production.
Fortunately, Docker provide a powerful tool that helps with all of the above: multi-stage builds. The main idea is that we can have multiple FROM commands in the Dockerfile, one per stage, and each stage can copy files from previous stages. Let’s see how to set that up:
diff --git a/Dockerfile b/Dockerfile
index d48e026..6c8965d 100644
--- a/Dockerfile
+++ b/Dockerfile
@@ -1,4 +1,4 @@
-FROM node:10.16.3
+FROM node:10.16.3 AS development

 RUN mkdir /srv/chat && chown node:node /srv/chat

@@ -10,5 +10,14 @@ COPY --chown=node:node package.json package-lock.json ./

 RUN npm install --quiet

-# TODO: Can remove once we have some dependencies in package.json.
-RUN mkdir -p node_modules
+FROM node:10.16.3-slim AS production
+
+USER node
+
+WORKDIR /srv/chat
+
+COPY --from=development --chown=root:root /srv/chat/node_modules ./node_modules
+
+COPY . .
+
+CMD ["node", "index.js"]
-
Our existing
Dockerfilesteps will form the first stage, which we’ll now give the namedevelopmentby addingAS developmentto theFROMline at the start. I’ve now removed the temporarymkdir -p node_modulesstep needed during bootstrapping, since we now have some packages installed. -
The new second stage starts with the second
FROMstep, which pulls in theslimnode base image for the same node version and calls the stageproductionfor clarity. Thisslimimage is also an official node image from Docker. As its name suggests, it is smaller than the defaultnodeimage, mainly because it doesn’t include the compiler toolchain; it includes only the system dependencies needed to run a node application, which are far fewer than what may be required to build one.This multi-stage
Dockerfilerunsnpm installin the first stage, which has the full node image at its disposal for the build. Then it copies the resultingnode_modulesfolder to the second stage image, which uses theslimbase image. This technique reduces the size of the production image from 909MB to 152MB, which is about a factor of 6 saving for relatively little effort 6. -
Again the
USER nodecommand tells Docker to run the build and the application as the unprivilegednodeuser rather than as root. We also have to repeat theWORKDIR, because it doesn’t persist into the second stage automatically. -
The
COPY --from=development --chown=root:root ...line copies the dependencies installed in the precedingdevelopmentstage into the production stage and makes them owned by root, so the node user can read but not write them. -
The
COPY . .line then copies the rest of the application files from the host to the working directory in the container, namely/srv/chat. -
Finally, the
CMDstep specifies the command to run. In the development stage, the application files came from bind mounts set up with docker-compose, so it made sense to specify the command in thedocker-compose.ymlfile instead of theDockerfile. Here it makes more sense to specify the command in theDockerfile, which builds it into the container.
Now that we have our multi-stage Dockerfile set up, we need to tell Docker Compose to use only the development stage rather than going through the full Dockerfile, which we can do with the target option:
diff --git a/docker-compose.yml b/docker-compose.yml
index ff92767..2ee0d9b 100644
--- a/docker-compose.yml
+++ b/docker-compose.yml
@@ -2,7 +2,9 @@ version: '3.7'

 services:
   chat:
-    build: .
+    build:
+      context: .
+      target: development
     command: node index.js
     ports:
       - '3000:3000'
This will preserve the old behavior we had before we added multistage builds, in development.
Finally, to make the COPY . . step in our new Dockerfile safe, we should add a .dockerignore file. Without it, the COPY . . may pick up other things we don’t need or want in our production image, such as our .git folder, any node_modules that are installed on the host outside of Docker, and indeed all the Docker-related files that go into building the image. Ignoring these leads to smaller images and also faster builds, because the Docker daemon does not have to work as hard to create its copy of the files for its build context. Here’s the .dockerignore file:
.dockerignore
.git
docker-compose*.yml
Dockerfile
node_modules
With all of that set up, we can run a production build to simulate how a CI system might build the final image, and then run it like an orchestrator might:
$ docker build . -t chat:latest
# ... build output ...
$ docker run --rm --detach --publish 3000:3000 chat:latest
dd1cf2bf9496edee58e1f5122756796999942fa4437e289de4bd67b595e95745
and again access it in the browser on http://localhost:3000. When finished, we can stop it using the container ID from the command above 7.
$ docker stop dd1cf2bf9496edee58e1f5122756796999942fa4437e289de4bd67b595e95745
Setting up nodemon in Development
Now that we have distinct development and production images, let’s see how to make the development image a bit more developer-friendly by running the application under nodemon for automatic reloads within the container when we change a source file. After running
$ docker-compose run --rm chat npm install --save-dev nodemon
to install nodemon, we can update the compose file to run it:
diff --git a/docker-compose.yml b/docker-compose.yml
index 2ee0d9b..173a297 100644
--- a/docker-compose.yml
+++ b/docker-compose.yml
@@ -5,7 +5,7 @@ services:
     build:
       context: .
       target: development
-    command: node index.js
+    command: npx nodemon index.js
     ports:
       - '3000:3000'
     volumes:
Here we use npx to run nodemon through npm 8. When we bring up the service, we should see the familiar nodemon output 9:
docker-compose up
Recreating docker-chat-demo_chat_1 ... done
Attaching to docker-chat-demo_chat_1
chat_1  | [nodemon] 1.19.2
chat_1  | [nodemon] to restart at any time, enter `rs`
chat_1  | [nodemon] watching dir(s): *.*
chat_1  | [nodemon] starting `node index.js`
chat_1  | listening on *:3000
Finally, it’s worth noting that with the Dockerfile above the dev dependencies will be included in the production image. It is possible to break out another stage to avoid this, but I would argue it is not necessarily a bad thing to include them. Nodemon is unlikely to be wanted in production, it is true, but dev dependencies often include testing utilities, and including those means we can run the tests in our production container as part of CI. It also generally improves dev-prod parity, and as some wise people once said, ‘test as you fly, fly as you test.’ Speaking of which, we don’t have any tests, but it’s easy enough to run them when we do:
$ docker-compose run --rm chat npm test

> chat@1.0.0 test /srv/chat
> echo "Error: no test specified" && exit 1

Error: no test specified
npm ERR! Test failed.  See above for more details.
Here’s the final code on github.
Conclusion
We’ve taken an app and got it running in development and production entirely within Docker. Great job!
We jumped through some hopefully edifying hoops to bootstrap a node environment without installing anything on the host. We also jumped through some hoops to avoid running builds and processes as root, instead running them as an unprivileged user for better security.
Node / npm’s habit of putting dependencies in the node_modules subfolder makes our lives a little bit more complicated than other solutions, such as ruby’s bundler, that install your dependencies outside the application folder, but we were able to work around that fairly easily with the nested node modules volume trick.
Finally, we used Docker’s multi-stage build feature to produce a Dockerfile suitable for both development and production. This simple but powerful feature is useful in a wide variety of situations, and we’ll see it again in some future articles.
My next article in this series will pick up where we left off about testing node.js services in Docker. See you then!
Onward to the series about testing!
Thanks to Hope Thomas, Ali Smith and Miguel Serrano for reviewing drafts of this article.
If you’ve read this far, you should follow me on twitter, or maybe even apply to work at Overleaf. :)
Appendix: Dealing with UID mismatches on Linux
When using bind mounts to share files between a Linux host and a container, you are likely to hit permissions problems if the numeric uid of the user in the container doesn’t match that of the user on the host. For example, files created on the host may not be readable or writable in the container, or vice versa.
We can work around this, but first it’s worth noting that if your uid on the host is 1000, everything is fine for Dockerized development with node. This is because Docker’s official node images use uid 1000 for the node user. You can check your uid on the host by running the id command, which prints it out. For example, mine currently says uid=1000(john) gid=1000(john) ....
A uid of 1000 is fairly common, because it is the uid assigned by the ubuntu install process. If you can convince everyone on your team to set their uid to 1000, everything will work fine. If not, here are a couple of workarounds:
-
Run the service as root in development by simply omitting the
USER nodestep from the development stage of the Dockerfile (introduced in the Docker for Dev and Prod section). This ensures that the user in the container (root) will be able to read and write files on the host. If the user in the container creates any files, they’ll be owned as root on the host, but you can always fix that by runningsudo chown -R your-user:your-group .on the host.You can (and should) still run the process as an unprivileged user in production.
-
Use Dockerfile build arguments to configure the UID and GID of the node user at build time. We can do this by adding a few lines to the development stage of the
Dockerfile:FROM node:10.16.3 AS development ARG UID=1000 ARG GID=1000 RUN \ usermod --uid ${UID} node && groupmod --gid ${GID} node &&\ mkdir /srv/chat && chown node:node /srv/chat # ...This introduces two build args,
UIDandGID, which default to the existing value of 1000 if no arguments are given, and changes thenodeuser and group to use those IDs before creating any files as the user.Each developer with a non-1000 uid/gid has to set these
argsfor Docker Compose. One way to do this is to use adocker-compose.override.ymlfile that is not checked into version control (i.e. is in.gitignore), to set theargs, like this:version: '3.7' services: chat: build: args: UID: '500' GID: '500'In this example, the uid and gid in the container will be set to 500. There may be some easier ways of doing this one day. Again, these changes only need to be done in the development stage, not production.
Footnotes
-
Fundamentally, it doesn’t matter where the files go in the container.
/optwould also be a very reasonable choice. Another option would be to keep them under/home/node, which simplifies some file permissions management in development but requires more typing and makes less sense in production, where I’ll advocate letting root own the application files as a way of keeping them read only. In any case,/srvwill do. ↩ -
Both the 2.x and 3.x versions of the Docker Compose file format are still being actively developed. The main benefit of the 3.x series is that it is cross-compatible between single-node applications running on Docker Compose and multi-node applications running on Docker Swarm. In order to be compatible, version 3 drops some useful features from version 2. If you are only interested in Docker Compose, you might prefer to stick with the latest 2.x format. ↩
-
Some of this trickery in the
Dockerfilecan be removed if we allow thenpm installbuild step to run as root. If we do, we can and should still use the unprivileged node user at runtime, which is where most of the security benefits reside. ADockerfileto run the build as root and the container as the node user would look more like this:FROM node:10.16.3 WORKDIR /srv/chat COPY package.json package-lock.json ./ RUN npm install --quiet USER nodeThis is cleaner, without the need for some
mkdirandchowntricks, at the expense of runningnpm installas root at build time. Overall, I think the modest increase in complexity is worth it to avoid running the build as root, but you might decide that you prefer the cleanerDockerfile.One caveat if you build as root is that when you want to later install new dependencies you need to run a shell as root instead of the node user, as in
docker-compose run --rm --user root chat bashand thennpm install --save express. This is a bit like “sudoing” to install packages, which is a fairly familiar experience. ↩ -
We could instead use an anonymous volume to contain the modules, just by omitting the name:
diff --git a/docker-compose.yml b/docker-compose.yml
index c9a2543..5a56364 100644
--- a/docker-compose.yml
+++ b/docker-compose.yml
@@ -6,3 +6,4 @@ services:
     command: echo 'ready'
     volumes:
       - .:/srv/chat
+      - /srv/chat/node_modules
That would be shorter, but it is very easy to forget to clean up anonymous volumes, which leads to a profusion of anonymous modules with no indication which container they came from. You can still clean them up with
docker system prune, but that is a bit of a ‘sledge hammer to crack a nut’. The named volumes approach is a bit more verbose but also more transparent.(Extra credit: you might wonder where those dependency files in the volume actually get stored. In short, whether using named or anonymous volumes, they live in a separate directory managed by Docker on the host; see the Docker docs about volumes for more info.) ↩
-
The eagle eyed reader may have noticed that we don’t have to
docker-compose buildto get the dependencies installed beforedocker-compose up. This is because it is running with the node modules in thechat_node_modulesnamed volume. The next time we do a build, npm will install the dependencies from scratch into the image, but for installing packages day-to-day, we can just runnpm installin the container without having to rebuild.If you ever find yourself in a situation where you want to get rid of the named volume and start from scratch, you can run
docker volume listto get a list of all volumes. The full name of your node modules volume will depend on your docker compose project. In my case, the volume of interest isdocker-chat-demo_chat_node_modules, which can be removed if we first remove the container withdocker-compose rm -v chatand then the volume itself withdocker volume rm docker-chat-demo_chat_node_modules. ↩ -
Docker also provides an official
alpineimage variant that is even smaller. However, these size savings come in part from using a completely differentlibcand package manager than the Debian-based images. Unless you are deploying to embedded systems where space is at a premium, the complexities that may arise due to these differences may not be worth it, especially when the Debian-based slim images already offer substantial savings. ↩ -
You might notice that it takes about 10s to stop. This is because the socket.io chat example does not correctly handle the
SIGTERMsignal, which Docker sends it when it’s time to stop, to perform a graceful shutdown. Extra credit: add this code to the end ofindex.js:process.on('SIGTERM', function() { io.close(); Object.values(io.of('/').connected).forEach(s => s.disconnect(true)); });then rebuild the production image and try to run and
docker stopthe container again. It should disconnect any clients and stop promptly after that change. ↩ -
An alternative to using
npxwould be to put the command in an npm script, such as fornpm start. However, running npm scripts in a container can easily cause theSIGTERMfrom Docker to get lost, leading to non-graceful (10s) shutdowns even when the child properly handles the signal; see 7. This is because older versions of npm did not pass the signal to the child, and, even though that’s now fixed, the child typically runs in a shell, and most shells (bash, at least) do not pass signals to their children. One workaround is to useexecin the script, as inexec nodemon server.js, which replaces the shell process with the node process, but it’s easy to forget. Moreover, running a command through annpmscript creates some overhead, namely an additional node process. So, other things being equal, it’s best to define long running commands in theDockerfile(with the exec form ofCMD) or Docker Compose files instead. For short-running scripts, such asnpm test, where signal handling is not a concern, npm scripts are usually fine. ↩ -
You may notice that nodemon says that typing
rswill restart it. That won’t work if we usedocker-compose upto bring up the service, because our terminal is not connected to nodemon’s standard input when we do that. If we rundocker-compose run --rm chatinstead,rsshould work as usual; this can be useful when working on one service in particular. ↩